I modeled the hair for the Phoenix model and I also played around with the bloom effect a little more.You can follow my progress on the zbrush forum here Phoenix W.I.P.
Thursday, August 26, 2010
Wednesday, August 25, 2010
"The Bloom Effect"
When I was looking at new video games, I noticed they all had this glowy look to them. After doing some research I learned that the term for this is "Bloom effect". It is used to simulate hotspots in light and give depth to the atmosphere, thus giving it a real life effect. So I thought I would give it a go, and try to figure it out.
Its actually really simple in 3ds max. you add a blur effect in the effects pullout menu.You then choose the "pixel selections" tab.Uncheck "whole image", check "Luminance" set the brightness to 100%, The min to 85% and the feather radius to something like 15%. Blend to 30% and Max to 100% Make sure its on mental ray when you render. It takes a few seconds after complete render to kick in. Do not use default scan line renderer, it chokes up something awful.
Here is the test image I made. I think the bloom effect is my new friend, it looks so cool! Here is the before and after.
Wednesday, August 18, 2010
New Model W.I.P: Phoenix from the X-Men (Part II)
At first i wanted the Phoenix to look like Famke Jansenn from the x-men movies. But it was brought to my attention on the zbrush forums that I should go for a more realistic red head. that is what follows the famke jansenn model.
New Model W.I.P: Phoenix from the X-Men
Here are a few work in progress shots. I'm holding off on the costume and working on the face. I want to redesign the costume a little.


Wednesday, August 11, 2010
Coca-Cola for the win
I thought i would model a Coca-Cola bottle while drinking one.....It was the obvious thing to do. Everything was modeled in 3ds max and textured in photoshop.
Spider-Man 2.0
Ok, so after getting my Spider-Man model critiqued, I went back into zbrush and worked on the anatomy some more. The results i am happy with and I am ready to moved onto the next model. :)
Thursday, August 5, 2010
New Render of Spider-Man
I fixed most of the Uvs and adjusted the proportions a little more for this model. I also played around with the depth of field effect for the camera in 3ds max.
 |
| Spider-Man in Times Square (Click for High-Res) |
Labels:
3d studio max,
camera,
model,
Spider-Man,
uv
Wednesday, August 4, 2010
Everyone Makes Mistakes
Here are a few flaws I found when looking closer at my Spider-Man model. They are easy fixes, Thank God! I just have to shorten the head and work on the UVW's
 |
| Seams got messed up when using the symmetry modifier. :/ |
 |
| The webbing is slightly different sizes, when close up. |
Labels:
3d studio max,
flaws,
model,
Spider-Man
Spider-Man Renders
Here is the refined renders. Rendered in 3ds Max and then touch ups in Photoshop.
 | |||
| Original Spider-Man Costume. (Click For High-Res.) |
 |
| Symbiote Spider-Man Costume. (Click For High-Res.) |
 |
| Add caption |
Labels:
3d studio max,
3ds max,
Autodesk,
model,
photoshop,
Spider-Man
Does whatever a Spider can....
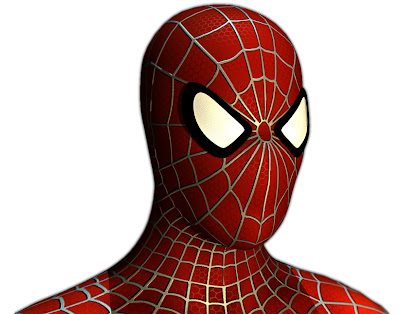
Here is a model that I have been working on for a few weeks. I really want to improve upon my 3d work, as well as add new things to my demo reel and portfolio. So I figure why not model characters that everyone knows to the best of my ability. Here are a few shots that I saved of the progress work. Then the post after this I will post the refined images.
 |
| Screen shot of the W.I.P of Spider-Man |
 |
| Test Render of Spider-Man, The bump map was way too strong. |
 |
| The maps used in the model of Spider-Man. Done in photoshop & ZBrush. |
Labels:
3d studio max,
3ds max,
model,
photoshop,
Spider-Man,
zbrush
New Work in The Works
Here is a 3d model I made a month ago from the Egyptian Cat design I made a few years ago. It was both fun, and a pain to work with the hair and fur modifier in 3ds max because you need a ridiculously powerful computer for the program not to crash.
Subscribe to:
Comments (Atom)


